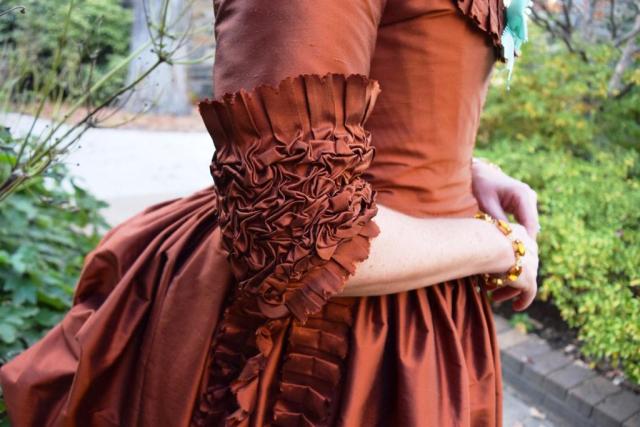
I’ve finally gotten around to doing a sort-of how-to post on the ruched sleeve cuffs of my rust 1780s Italian Gown. This is very far from an authoritative description or tutorial as it was entirely trial and error, my own cuffs are far from perfect and I didn’t have a full tutorial in mind when doing it. But, hopefully it can somewhat helpful to people and it would be awesome if it was a starting point for someone to come up with a much better and more comprehensive how-to!
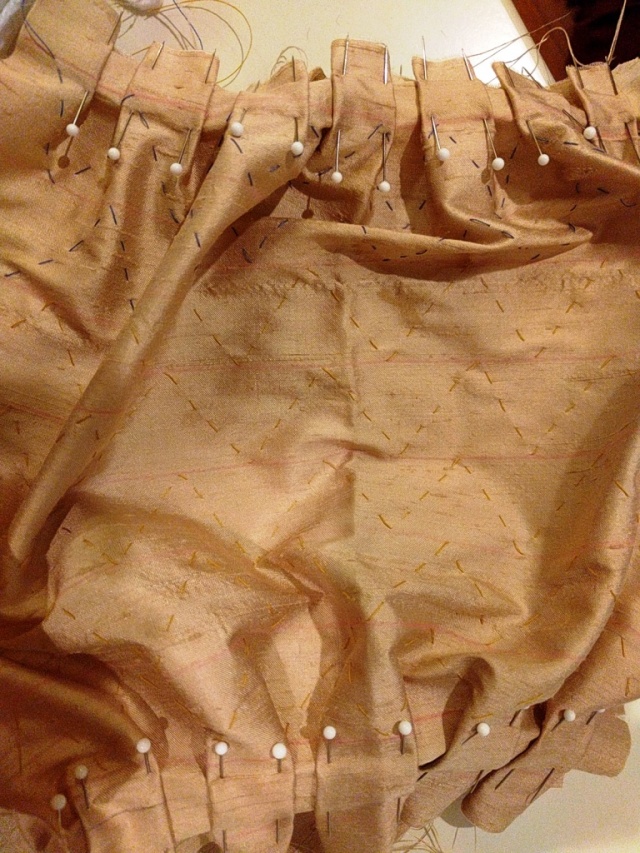
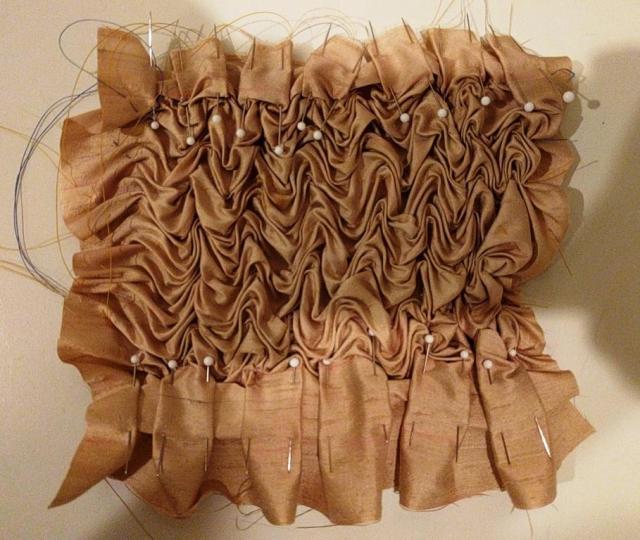
My first couple of try-out samples were based on regular patterns of stitching and the technique of doing zig-zag stitching across a length of ribbon to gather it up into a scalloped shape.
I just sewed multiple rows of these across the breadth and length of my sample fabric piece:
And gathered it up like so:
While this did create a very pretty effect and I believe one I’ve seen once or twice on cuffs from the period, it wasn’t the actual one I was going for. Although I may use it at some point in the future.
So I tried again.
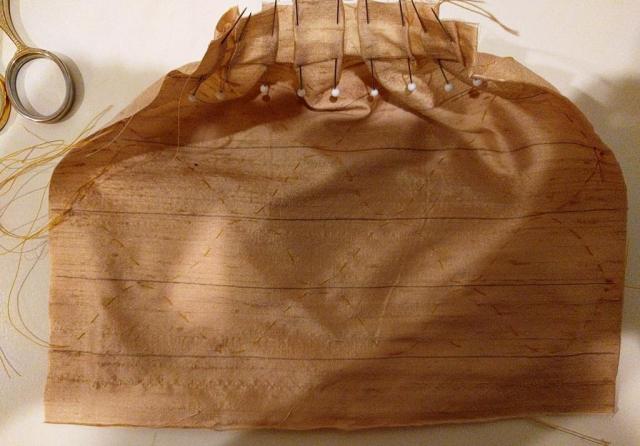
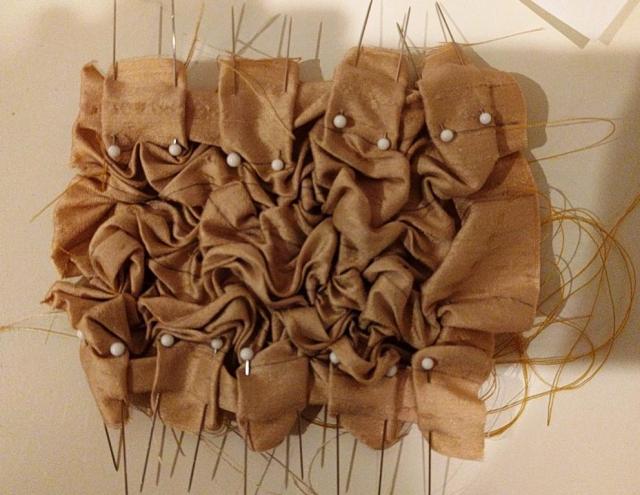
This time, I did softer lines in a sort of diamond pattern:
That gathered up like this:
I felt I was getting a little closer with the ruching looking more random than the first sample, but I didn’t like how there were close gathers in one spot and comparatively large puffs in others
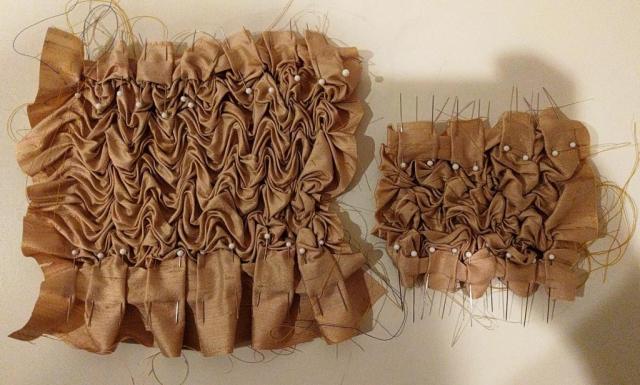
Just for comparison purposes, here are the first two samples side-by-side:
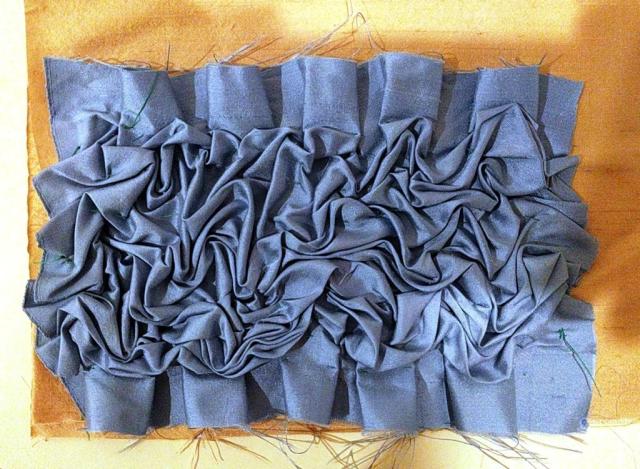
For my third test sample I took the concept of zig-zag and undulating stitching lines but free-handed them with a single line of stitching over the sample piece and pulled up the thread as I went along.
Not 100% perfect but definitely the closest so far!
So this was the method I went with for my actual cuffs.
One thing to note about how I did these what that I pleated the upper and lower edges of the fabric before starting the ruching – you can see this on the samples as well as the actual cuffs. I would highly recommend doing this if you’re going to try these out. If you were to ruch first it would be much harder to control the fabric so as to have fairly regularly sized and spaced pleats afterwards.
Additionally, the ruching is all stitched to a linen lining/base – I did this with the final (blue) test sample as well, I just forgot to photograph it.
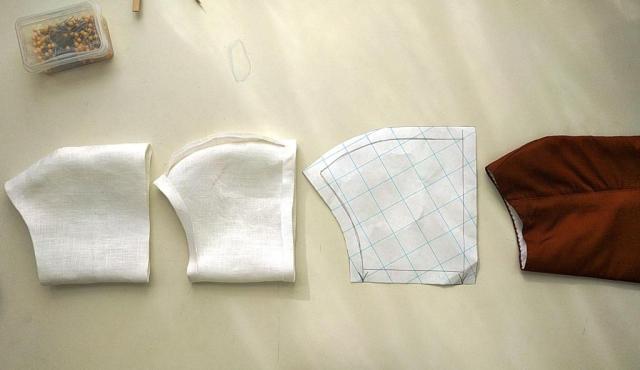
But here are the actual cuff lining/base pieces. I pretty much just traced the end of the actual sleeve to get the correct shape:
I don’t have very good process photos of this method, it’s tricky to get as you continually pull up the thread as you work. I was also working to a deadline and really just wanted to concentrate on finishing!
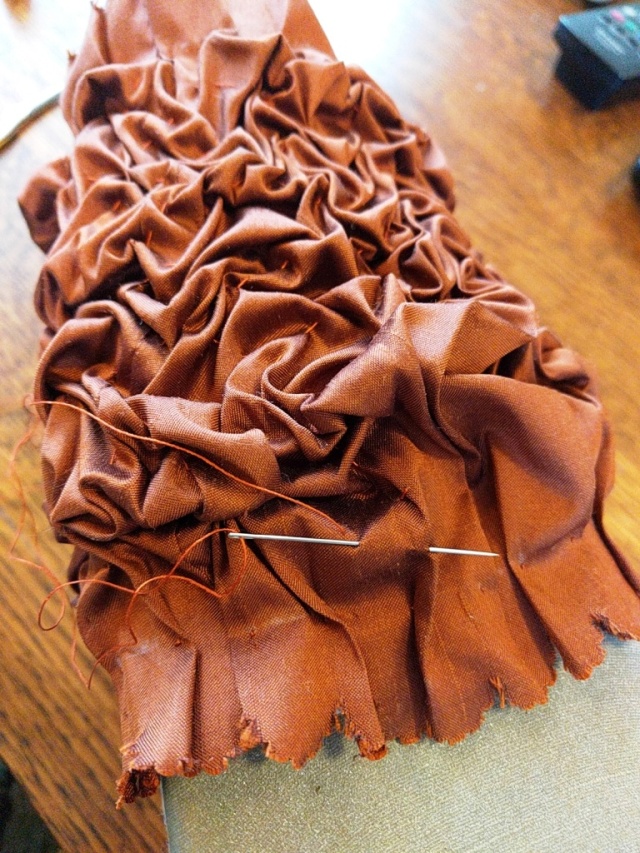
But here you can see that I sewed up the cuff piece in the round first and how the ends of the cuff pieces were box pleated and tacked in place to the lining first. You can also get a sense of the size of stitch I took. And I worked from one edge of cuff up to the other, stitching around and around it in a spiral of very wonky zig zags and undulating lines.
Now, not every stitch of the ruching also went through the lining. I would take a few stitches through the silk only, usually in a relatively straight but diagonal-ish line, pull the thread up gently, then tack the fabric to the lining near the last stitch I’d taken. Does that make sense?
In the close-up photo the thread is pretty visible, which concerned me a little. You don’t want to pull the thread *too* tight, you want to maintain that soft, sculptural quality to it – unless you’ve made your cuffs much fuller than mine here!
However, from any sort of distance you can’t really see the threads, so that was a relief
The final touch was to give the cuffs a very gentle pressing to slightly smoosh the ruching.
The Junk in the Trunk
One of my favourite (among many) aspects of late Georgian fashion are the big butts – the proto-bustles! They somehow just make the whole look of light, fluffy, frothiness in this period!
And while I’m often willing to cut film/TV productions a fair amount of slack with regards to the finer points of Historical Accuracy I get really disappointed in productions set in the 1770s through 1780s that feature limp dresses. I just feel it’s such a wasted opportunity for fabulousness!

“Love and Friendship”, 2016. Could they really not afford an extra panel of fabric for her skirt? And is she wearing even one petticoat under there?

“Poldark” Season 1. Overall pretty dresses, despite whatever weirdness is going on with the cut and fit of Demelza’s bodice. But the skirts just look so sad and droopy, poor things!
For comparison purposes, here is a fashion plate from the same period as the above productions:

Journal des Luxus und der Moden, Tafel 11, April 1788
No way was I going to let MY skirts be sad and limp looking but my fabric wasn’t going to get there on its own, not even when drawn-up a la Polonaise (not to be confused with the actual Polonaise style of dress).
So, I was going to need some help under there.
During a research trip to the UK I took over 2012/2013 I came upon this little gem in the collection at the Gallery of Costume at Platt Hall, Manchester:
Unfortunately, I failed to take any measurements, d’oh.
But that was mostly ok since I could use my own measurements and compare them with the proportions of the original to get a pretty close approximate:
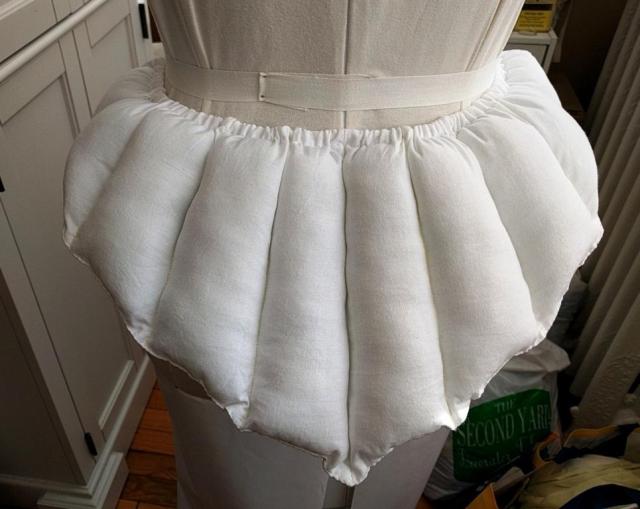
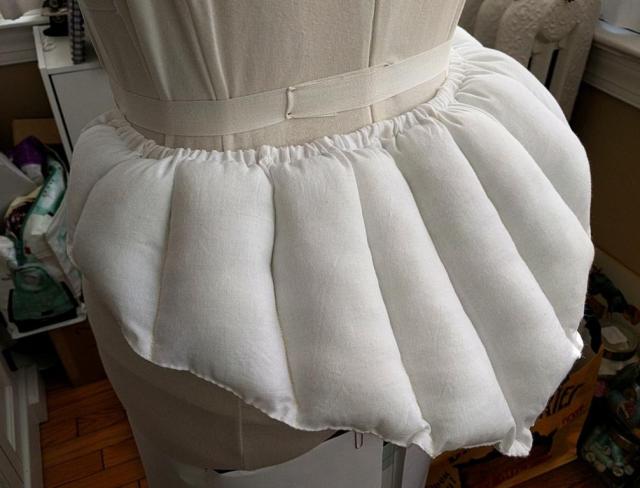
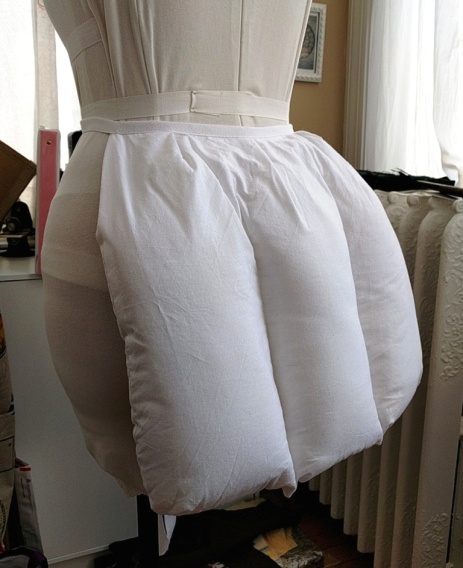
It’s two layers of bleached cotton broadcloth stuffed with a combination of polyfil and wool batting (leftovers from various other projects I had on hand)
It’s a combination of machine and hand-stitched. I was wasn’t worrying overmuch about HA construction on this since it was as much of an experimental piece as a (hopefully) wearable one.
Unfortunately, while it added some fullness to the back(side) it wasn’t as much as I wanted. I needed something more!
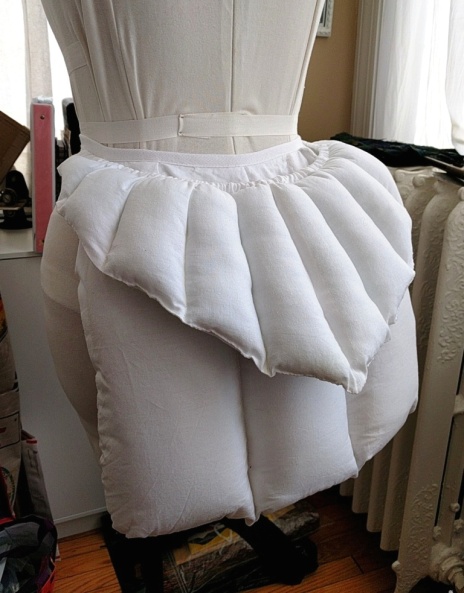
In a pinterest search I ran across this one from a post on Before the Automobile – THE Gold Standard for historical sewing:

which was based on an example in a rather famous 1780s satirical print, The Bum Shop

Seriously. 18th century satirical prints really are just the best!
I think the example in question is the slightly pinkish one just left of centre on the wall between the two ladies’ heads, another version of which seems to be in darker pink on the right-most lady.
Again, this was experimental, I wanted to do it quickly and use only what I had on-hand so it’s also not very HA construction and materials-wise, but I was fine with that!
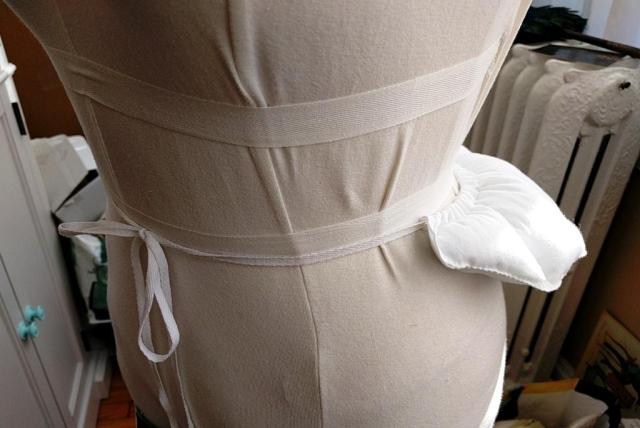
And I actually wear them together to get as much backside floof as I can!
I wear the smaller on top of the larger, with the smaller set down a little to avoid the back of the skirt sticking straight out from the waist, I want it starting a little lower.
So, who will be next to do a ruched sleeve cuff, hmmmm? I want to see some more!
And do you have any false rump wisdom you can share for my future reference?


Thanks for the details, this is great! I’m currently working on an Italian gown (you answered one of my questions in the FB group) and I haven’t decided yet what sort of cuff treatment I’m going to do.
LikeLike
Thank you – and you’re welcome! I hope I was of some help on the FB group. And this is only one of several cuff styles to choose from for this date, all of them charming in their own ways!
LikeLike
If you don’t mind, do you have links to some cuff pictures you are particularly fond of? I’d love to get some cuff-variation out there!
LikeLike
Hmmm, I don’t really have any particular links but I just experimented with doing a pinterest search for “1780s sleeve cuffs” that yielded a number of great results lickety-split!
LikeLike
RE: the sad flat skirts, so much droop, makes me want to take up a collection for the poor productions. Penny for a petticoat?
LikeLiked by 1 person
Ohmygosh YES.
LikeLike
AND this gown is Fabulous!
LikeLike
Great to hear a little more—the ruching is fascinating. and I love the 1700s bum shop!!!
LikeLiked by 1 person
Yep. I don’t think anyone’s yet surpassed the Georgians when it comes to satirical prints/cartoons!
LikeLiked by 1 person
Yes, the limp dresses of Poldark drove me nuts! Even a few petticoats would have helped!
Your dress and underclothes are amazing and stunning!!!
LikeLiked by 1 person
Thank you! Yeah, I just don’t get the whole limp late Georgian dresses thing on screen. And the lack of any substance under the skirts also makes them look kinda cheap IMHO.
LikeLike
Thank you. Should I ever need some bum floofing I now know where to look! 😂
LikeLike
I made a “split bum” like this and it works pretty well, especially with gowns that have a point in the back (moving on from en fourreau to 4 piece back): http://twonerdyhistorygirls.blogspot.com/2014/03/that-big-georgian-bum-c-1780.html
I may try it with the smaller pad on top – I made one similar to yours and had the same result – not quite enough! Awesome job on this project BTW – thank you so m uh for sharing! I must try this type of cuff!
Laura Mason Lockard
http://www.ageofantiquity.com
LikeLike
Thank you! And I think I’m going to have to experiment with that split style. It looks like it really gives that nice side to back fluffiness.
LikeLike
Thanks for sharing your process, it’s always great to see how things were made!
LikeLike
Thank you! I’m glad you enjoyed it – and thanks for visiting!
LikeLike
This is amazing! Congrats! I have an unrelated question but thought that I may as well ask it under this post. I found a fabric I love for an 18th-century dress and it’s so pretty but it’s also super light weight. I was wondering if you had any tips for what/how I should line the fabric to make sure it is sturdy enough for a robe a l’anglaise. The fabric is cotton, if that helps. Thank you so much and I can’t wait to hear more about your dresses!
LikeLike
Thank you! Re your fabric, there were really lightweight fabrics made into dresses at this time without lining them (well, apart from the bodice, which is nearly always lined). We often associate the super lightweight, diaphanous cotton muslin fabric with the Neoclassical/Regency period, but it was actually first used during the 1780s and made into styles such as the Anglaise. Now, I can’t see your fabric first-hand so can’t say for sure but you may well not have to line it at all. If it is very fluid, like chiffon or georgette, you may want to line it to give it a slightly crisper hand – historical cotton muslin can be whisper thin, but it’s hand is more floaty than flowy, if that makes sense.
Hope this helps some and good luck with your dress!
LikeLike
How did you get that pretty little scalloped edge? Fancy pinking shears? How would it have been done during that period?
LikeLike
Hi there! The scalloped edges on the cuff pieces were actually done the historical way – using a sort of die called a pinking tool. Do a quick google image search for the term “pinking tool” and you’ll immediately get several hits that show what it is!
LikeLike
Hello
I am actually trying to make this exact same dress (if you are getting the pattern from the janet arnold book anyway)- and I have basically zero costume experience…
My main worry is how I am going to do the dress up at the front.
Are you able to upload a picture of your bodice closure?
I know its with hooks and eyes but i need them to be invisible and It is going to be a big challenge!!
LikeLike