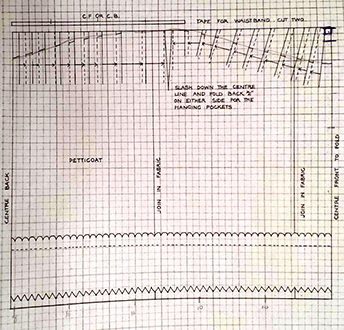
The style of the petticoat is based off the original one that goes with my primary dress inspiration/pattern in Patterns of Fashion:
Although to make it I simply cut 2 panels of my fabric, with the back slightly longer than the front to help accommodate the false rump that’s going under there. I also pleated mine differently from the original since it appears to have been done according to an older style where the pleats all face towards the side/pocket openings – another clue that the ensemble *may* have been an earlier one altered in the late 1770s/early 1780s. During the later period petticoat pleats tend to all face towards the centre back similarly to dress skirts, although the pleats themselves tend to be larger than on dress skirts.
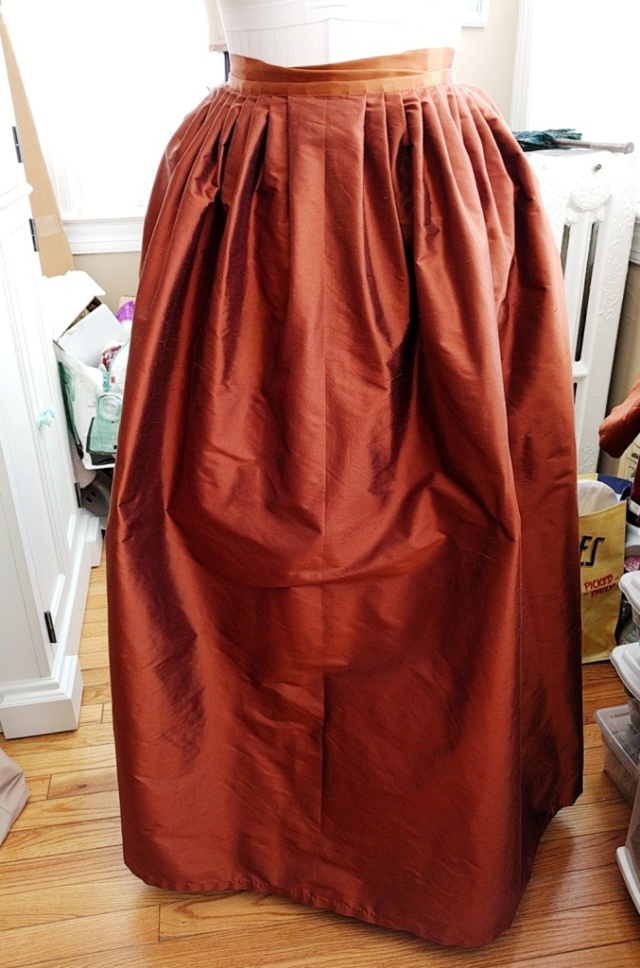
Here’s how mine turned out:
The line you see down the centre front is just the fold crease in the fabric, not a seam. The seams are at the sides.
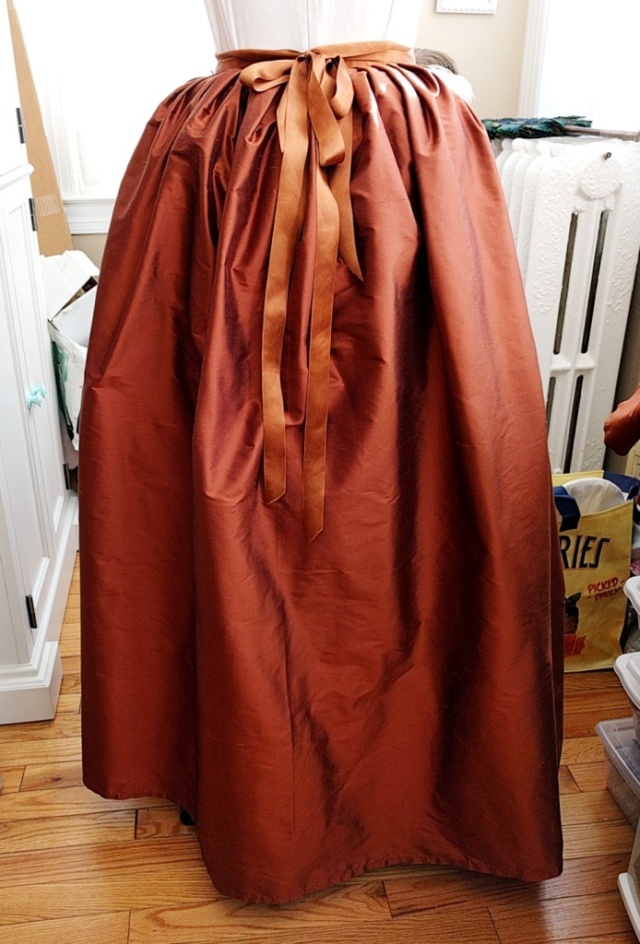
As you can see, there are two sets of ties done up at the back. The two sets of ties is period correct but I admit I’m not sure that having them both tie at the back is. It was an aesthetic choice on my part to help limit the amount of bulk at the front waist – I didn’t want the bulge of a knot showing under my bodice!
Here it is from the side, you can see a little of the pocket opening near the top:
And here’s how the ties work. The back part of the petti is tied first, with the ties crisscrossing all the way around the waist:
Then the front is tied to slightly overlap the back:
The ties are also the waist binding and are made of a buttery soft silk satin ribbon from the Sign of the Golden Scissors. They were originally coral in colour (or “orange apricot” according to the listing) – and seemed the closest shade to my silk, believe it or not. I first tried just tea staining them to brown the colour a little but soon discovered this wasn’t enough. Fortunately, I have a whole jar full of dylon dyes from years and years ago so I used a “koala” brown and got a shade much closer to my silk.
Of course, after this I remembered another source for silk satin ribbon, Britex Fabrics, and, of course, they have a colour that looks to be a near perfect match for my silk, which they call Cinnamon. I could have saved myself some time had I thought of them earlier but it was nice to have a reason to use up some of these dyes that have been hanging around for so long!
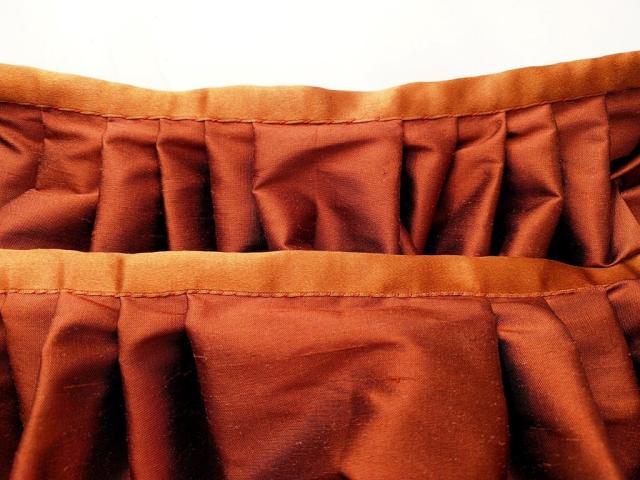
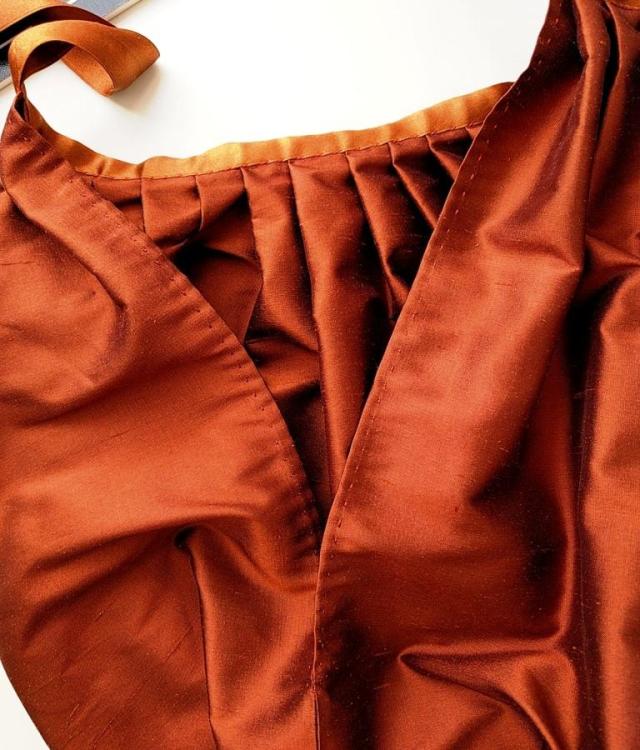
The waist edges are bound by the ribbon and sewn with small slanted hemming stitches on both the exterior and interior – as in, I sewed the ribbon to the exterior of the petti only and then sewed it to the interior. Again, this made for more work but I liked the look and I feel like this makes it all extra secure rather than just running stitching all the layers together in one go.
The side seams are just the selvedges of the fabric running stitched together. I finished the side/pocket openings by
I took 1 inch for the hem, double folded it to a final width of 1/2″ and sewed it with running stitches that were longer on the inside than the outside. Here you see both for a comparison:
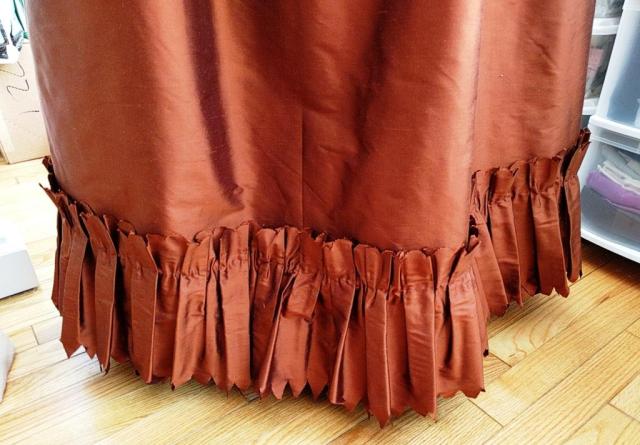
The flounce around the hem is a really neat design of scallops across the top and Vandyke points across the bottom.
A member of the facebook 18th century sewing group shared a brilliant idea to help with cutting these out – a paper template!
Although the circumference of my petticoat is different from the original the fullness of the flounce was easy to calculate – it’s very handily just 2x that of the petti.
Although I had regular (zigzag) pinking shears already I was very keen on the mini-scalloped pinking of the original garment – as shown on the pattern schematic and Janet Arnold’s sketches – so I actually purchased a pair specifically for doing this. Of course, I now have them to use on all kinds of other things! I got mine off of etsy, here’s a link to a search for “scalloped pinking shears” on there to show you the variety of options available there.
According to the pattern the flounce is box pleated and stitched about 2″ down from the upper edge. I lightly drew a line along the length of the flounce with a chalk pencil and used it both as a guide for pleating and for stitching.
You may notice that my flounce isn’t just box pleated, it’s also slightly gathered. I have often observed that box pleated trims on 18th century clothing do not lie entirely smoothly, they tend to be a little puckered in addition to pleated. Now, whether this was the original intent, the effect of later re-making/re-working or simply somehow the effect of age, I don’t know. But I kinda like it. So I incorporated that into my flounce. I may have gone a little more puckered than the norm but I’m ok with it…..
I feel like it adds just a little more dimension to the overall look that smooth/flat box pleating.
And here it is all finished and pretty!
What do you think of the “puckered” box pleats? Do you think it adds to the effect or just makes it look messy? Don’t be afraid to tell me what you really think!
Also – just a quick note that I do intend to create a separate post on how I made the ruched/puckered sleeve cuffs but that will probably be after I’ve finished posting about the rest of the outfit.






thanks for the lovely pics and know-how! Miss having you here in Kingston and seeing your creations photographed at Queen’s University campus or the Agnes Etherington Gallery.
LikeLike
Thank you! Although I love it here in DC I too miss Kingston, too! I’m really hoping we’ll live there again!
LikeLike
I Love It!
LikeLike
Thank you!
LikeLike
Beautiful! And I love how you did the ruffle—looks great!
LikeLike
Thank you! I am pretty pleased with it :o)
LikeLike
So much fabric… and such beautiful fabric too! This is going to be fabulous!
LikeLike
Maybe not so very much as you might think, or at least not so much as historical outfits *can* eat up! I did the whole ensemble – dress, petticoat, all the trimming – with 8yds or 54″ wide silk. But yeah, it’s still a fair bit. I *love* the colour too, love it love it love it! Lol
LikeLiked by 1 person
Well for 8 yards it is worth it – beautiful! 😍
LikeLike
I was feeling the skirt pain, and then the self fabric trim! Ah, lovely!
Somehow, repeating the simplest motif (either in dance or sewing) becomes an epic piece of art.
LikeLike
Simple repetitions, and its cousins like accumulations and palindromes, are common to so many art making cultures that I think there must be something on the human genome that links it to our fundamental structure.
LikeLike
That is a really fascinating observation, I think you must be right. Humans do seem very fond of repetitions of simple motifs, and seem to very much appreciate the effect they create – often looking more complicated than they really are.
LikeLike
Pingback: c.1780 Italian Gown – In Action – literally! | The Modern Mantua-Maker